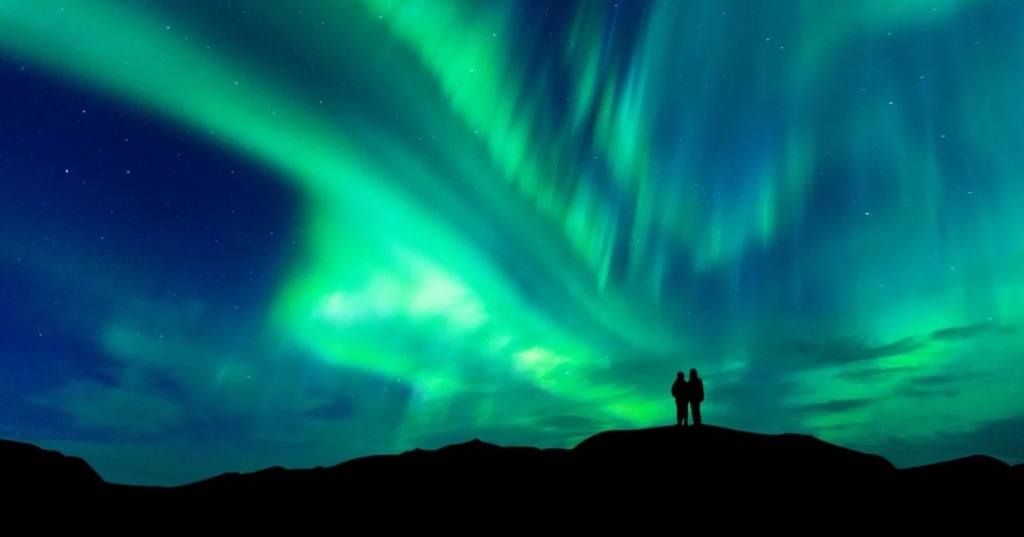
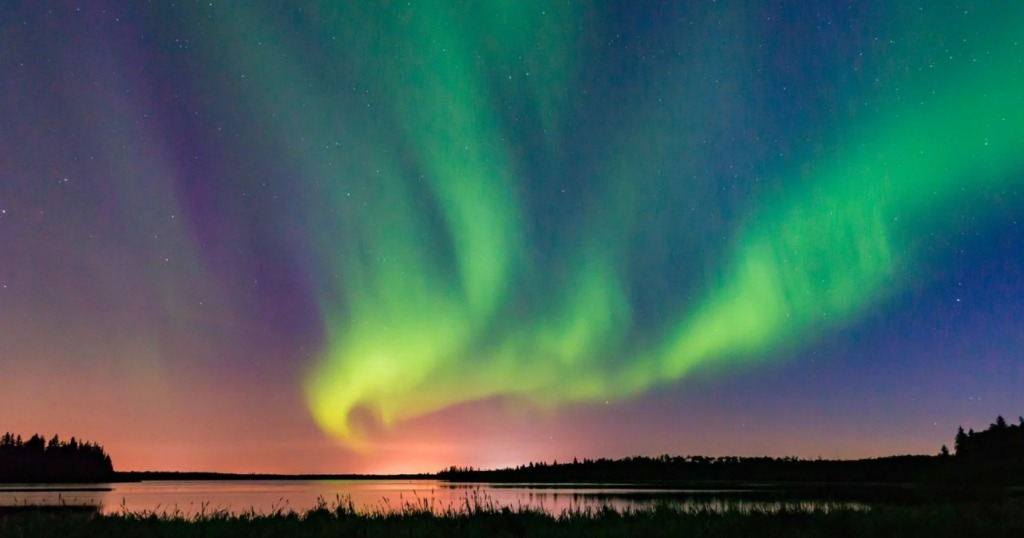
The sky explodes in silence. Rivers of ethereal green, violet, and crimson light twist and flow across a canvas of stars. This is the Aurora Borealis, the Northern Lights, and no spectacle on Earth compares to it. For those who chase this celestial phenomenon, known as “aurora hunters,” the ultimate goal is to witness it from the best possible vantage point.
That vantage point is Yellowknife.
Welcome to the Northern Lights Capital of North America. Located in the heart of the Northwest Territories, Yellowknife is a city forged in the rugged beauty of the subarctic, perched on the shore of the magnificent Great Slave Lake. It is a place of profound quiet and explosive natural wonder. While the aurora can be seen here for over 240 nights a year, the true “peak” season for hunters begins in November.
November is the gateway. It’s when the long days of the midnight sun are a distant memory, and the deep, profound darkness of winter takes hold. The air turns crisp, the lakes begin to freeze, and the first significant snows blanket the landscape. This combination of long nights and a unique climate creates the perfect stage for the aurora to perform.
But make no mistake: this is not a casual undertaking. Chasing the aurora in November requires preparation. It’s an adventure that pits you against the elements in pursuit of the sublime. This guide is your essential manual for preparing for the hunt, ensuring you are safe, warm, and ready to capture the magic of the Northern Lights.
Why Yellowknife? The Undisputed Aurora Capital
You may have heard Yellowknife called the “best place in the world” to see the Northern Lights. This isn’t just a proud local boast; it’s a scientific and geographic fact. For aurora hunters, location is everything, and Yellowknife has three unique advantages that make it superior to nearly any other accessible spot on the globe.
1. Geographic Gold: The Auroral Oval
The Northern Lights occur in a vast, ring-shaped area around the Earth’s magnetic north pole called the “Auroral Oval.” While this oval shifts and changes based on solar activity, Yellowknife’s location at 62.45° N latitude means it sits directly underneath this ring almost every single night.
You don’t have to hope the aurora “comes south” to see it. In Yellowknife, you are already in the front-row seat. When solar activity is high, the lights are not a faint smudge on the horizon; they are a crown, dancing directly overhead, stretching from one horizon to the other.
2. The “Clear Sky” Advantage
This is Yellowknife’s secret weapon. Many other aurora destinations (like Iceland or coastal Norway) are maritime climates. This means they suffer from high humidity, frequent storms, and, most critically for aurora hunters, persistent cloud cover. You cannot see the lights, no matter how strong they are, through a layer of clouds.
Yellowknife, in contrast, is landlocked and has a subarctic, semi-arid climate. It is essentially a “polar desert.” This results in:
- Low Precipitation: November is cold, but it doesn’t have the heavy, wet snowstorms of more southern regions.
- Low Humidity: The air is “dry cold.” This lack of moisture in the atmosphere means fewer clouds.
Yellowknife boasts an astonishingly high rate of clear or mostly clear nights during the aurora season. This meteorological advantage dramatically increases your chances of a successful hunt.
3. The 98% Statistic
Thanks to its position under the oval and its clear skies, the odds are overwhelmingly in your favour. Tour operators and local scientists confidently state that visitors who stay in Yellowknife for a minimum of three nights during the peak season have a 95% to 98% chance of witnessing the Aurora Borealis.
For a hunter, those are the best odds you will find anywhere.
Embracing November: The Start of the “Great Dark”
While the aurora is technically visible from late August, November marks the true start of the “peak” winter season. This is when the hunt becomes an authentically arctic experience.
The sun, which dominates the sky in summer, becomes a scarce commodity. Daylight hours dwindle rapidly, providing vast, 16+ hour stretches of deep darkness. This is the canvas you need. The aurora can technically be active at any time, but it is only visible to the human eye against a truly dark sky, far from the twilight of sunrise and sunset.
November is also when the cold truly sets in. This is not the mild chill of autumn; it is the arrival of the formidable arctic winter. Average temperatures in November can range from -17°C (1°F) to -24°C (-12°F), with wind chills making it feel even colder.
This may sound intimidating, but locals will tell you it is a “dry cold.” Unlike a damp, coastal cold that seeps into your bones, a dry cold is manageable with the right equipment. In fact, this cold is your ally—it is directly responsible for the crystal-clear, cloud-free skies that make November so reliable for viewing.
The Aurora Hunter’s Toolkit: Packing for the Arctic Cold
Your number one priority for a November trip is your clothing. You will be standing still for hours in temperatures well below freezing. There is no such thing as “overdressing.” Your gear is not just for comfort; it is your life support system.
The key is layering. Do not rely on one giant jacket. A proper layering system allows you to regulate your temperature, trap body heat, and wick away moisture.
The 3-Layer System: Your Foundation
- Base Layer (The “Wicking” Layer): This layer sits against your skin. Its only job is to pull moisture (sweat) away from your body. Never wear cotton. Cotton absorbs moisture and will freeze, making you dangerously cold.
- Must-Haves: Merino wool or synthetic thermal underwear (long-sleeved top and full-length bottoms).
- Socks: A thin, synthetic “liner” sock followed by thick, high-quality wool socks.
- Mid-Layer (The “Insulating” Layer): This is your heat-trapping layer. You may want more than one.
- Must-Haves: A fleece jacket, a down-filled “puffy” vest or jacket, or a thick wool sweater.
- Pants: Fleece-lined pants or a second pair of thermal bottoms.
- Outer Layer (The “Arctic Shell”): This is your shield against the elements. It must be windproof and, ideally, waterproof or water-resistant.
- Must-Haves: An extreme-cold-rated parka. Look for brands known for arctic-grade gear (like Canada Goose, Sorel, or Baffin). It should have a large, fur-lined (or faux-fur) hood to protect your face from the wind.
- Pants: Insulated snow pants or ski pants.
Protecting Your Extremities: The Non-Negotiables
Your head, hands, and feet will lose heat fastest. Do not cut corners here.
- Head & Face: You lose a massive amount of heat through your head. A balaclava or neck gaiter is essential to protect your neck and chin. Cover it with a warm toque (beanie) that fully covers your ears.
- Hands: Mittens are far superior to gloves. They keep your fingers together, generating more warmth. A good system is a thin pair of “glove liners” (which allow you to operate a camera) inside a pair of heavy-duty arctic mittens.
- Feet: This is where many people fail. Your running shoes or fashion boots will not work. You need insulated, waterproof winter boots rated for -30°C or lower. Make sure they are not too tight, as this restricts blood flow.
Essential Gear for the Hunt
Beyond clothing, a few small items make a huge difference during a long, cold night.
- Disposable Warmers: Bring dozens of chemical hand and foot warmers. Put them in your boots and mittens before you get cold.
- Thermal Flask: A high-quality thermos filled with a hot, non-alcoholic beverage (like tea, hot chocolate, or soup) is a game-changer for morale and warmth.
- Headlamp: You will be in complete darkness. A headlamp keeps your hands free. Get one with a red light mode. Red light preserves your night vision (and that of your fellow hunters) far better than white light.
The Hunt: Strategies for a Successful Sighting
You’re packed and prepared. Now, how do you find the lights? You have two primary options: a guided tour or a do-it-yourself (DIY) hunt.
To Tour or Not to Tour?
DIY (Renting a Car):
- Pros: You have complete freedom and privacy. You can stay out as long as you want and go wherever you please.
- Cons: You are responsible for everything. This means navigating unfamiliar, potentially icy roads in the dark, monitoring multiple weather and aurora forecasts simultaneously, and finding safe, legal places to pull over that are away from light pollution. If your car breaks down at -25°C, it is a life-threatening emergency.
Guided Tours:
- Pros: This is the highly recommended option, especially for first-timers.
- Expertise: Guides are professionals. They live and breathe this. They know the best, most secluded viewing spots.
- Logistics: They do all the work. They monitor the aurora forecast, space weather, and local cloud cover, and will drive to where the skies are clear.
- Safety & Comfort: They provide transportation, often have heated shelters or teepees (like at the famous Aurora Village), and provide hot drinks and snacks. They are also prepared for arctic emergencies.
- Photography Help: Many guides are skilled photographers and will help you set up your camera to get the perfect shot.
- Cons: Less flexibility than going on your own.
Know Before You Go: Tracking the Aurora
To hunt like a pro, you need the right intelligence.
- Check the Aurora Forecast: The aurora’s strength is measured by the Kp-index, a scale from 0 to 9. While a high Kp (4-5+) is exciting, Yellowknife is so far north that a Kp of just 1 or 2 is often enough for a beautiful display. Use apps like “My Aurora Forecast” or websites like Astronomy North.
- Check the Cloud Forecast: This is more important than the Kp-index. A Kp-9 storm is useless if it’s cloudy. Your goal is to find the clear patch of sky.
- Know the Time: While lights can appear anytime it’s dark, the “auroral peak” is often between 10:00 PM and 2:00 AM. Be patient.
Yellowknife’s Prime Viewing Locations
Whether on a tour or on your own, you need to get away from the city’s light pollution.
- The Ingraham Trail (Highway 4): This is the legendary “aurora-chasing” road. It’s a highway that stretches east of Yellowknife into the wilderness, dotted with frozen lakes and pull-outs. Prelude Lake Territorial Park and Vee Lake are popular stops.
- Frozen Lakes: A frozen lake provides a perfect, 360-degree, unobstructed view of the sky. Great Slave Lake, Frame Lake, or any of the smaller lakes along the Ingraham Trail are ideal.
- Pilot’s Monument: Located in Old Town, this is the best “in-city” option. A short climb up the stairs gives you a panoramic view over the bay and away from the worst of the downtown lights.
- Dedicated Viewing Villages: Tour operators run dedicated “villages” with amenities like heated teepees, yurts, and lodges, providing a comfortable and social base to wait for the show.
Capturing the Magic: A Beginner’s Guide to Aurora Photography
For many hunters, getting a photo is the ultimate prize. The aurora is dim to a camera, and you cannot capture it with a smartphone on “auto” (though the newest high-end phones are getting better). You will need specific gear and settings.
The Essential Photography Kit
- A Camera with Manual Mode: You must be able to control your settings. A DSLR or mirrorless camera is best.
- A Wide-Angle Lens: You want to capture the vastness of the sky. A lens between 14mm and 24mm is ideal.
- A “Fast” Aperture: The aperture is the “pupil” of your lens. You need one that can open very wide to let in light. Look for a lens with an f-number of f/4, f/2.8, or (ideally) f/1.8.
- A Sturdy Tripod: This is 100% essential. You will be using long exposure times (several seconds), and any tiny camera shake will result in a blurry mess.
- Extra Batteries: The cold kills batteries. A battery that lasts all day in normal weather might die in 30 minutes at -25°C. Keep your extras in a warm, internal pocket, close to your body.
The “Magic” Settings: Your Starting Point
Set your camera to Manual (M) mode.
- Focus: Manual Focus (MF). Your camera’s autofocus will not work in the dark. Switch your lens to MF and turn the focus ring to the infinity symbol (∞). Pro-Tip: During the day, autofocus on a distant object, then switch to MF and turn your focus ring down so it can’t move.
- Aperture: Set it to the lowest f-number your lens allows (e.g., f/2.8). This opens the aperture wide to let in the most light.
- ISO: This is your camera’s light sensitivity. Start at ISO 1600 or 3200.
- Shutter Speed: This is how long the camera’s “eye” stays open. Start with 10 to 15 seconds.
- If the photo is too dark, try a longer shutter speed (e.g., 20 seconds).
- If the aurora is moving very fast and “dancing,” try a shorter shutter speed (e.g., 5-8 seconds) to capture its sharp, defined edges.
Finally, set your camera’s 2-second timer or use a remote shutter. Just pressing the shutter button on the tripod will shake the camera enough to blur your shot.
Beyond the Lights: What to Do During the Day in November
The aurora hunt is a nocturnal activity. You’ll need to fill your (short) daylight hours. November is a time of transition, but there is still plenty to do as the city embraces winter.
- Culture & History: Spend an afternoon at the Prince of Wales Northern Heritage Centre. This world-class museum is free and provides incredible context on the land, the wildlife, and the Dene First Nations culture.
- Explore the City: Wander through Old Town, with its historic log shacks and unique houseboats frozen into the bay. Climb the Pilot’s Monument for a breathtaking daylight view of Great Slave Lake.
- Go for a Hike: The Frame Lake Trail is a beautiful loop around the lake, accessible right from the city, offering a great look at the subarctic landscape.
- See the Government: Visit the Legislative Assembly Building, a unique and beautiful piece of architecture that offers free tours.
- Early Winter Adventures: As the snow and ice set in, tour operators begin to offer iconic northern experiences.
- Dog Sledding: Many kennels start running tours on snow (rather than on carts) as soon as conditions permit.
- Snowshoeing: A fantastic way to explore the quiet, snowy forests.
- Ice Road Driving: The famous Dettah Ice Road may not officially open until December, but you can check its status. It’s a surreal experience to drive across the frozen lake.
Your Home Base for the Hunt

After a long, cold, and exhilarating night of staring at the sky, you will dream of a warm, comfortable, and truly restful place to return to. An aurora hunt is a test of endurance, and your “home base” is critical. You need more than just a room; you need a home.
This is where Rent in Yellowknife offers the perfect solution. Imagine returning to your own brand-new, luxury apartment at The View or Nova Pine Hills. You can shed your cold gear in a spacious entryway, brew a hot drink in a modern, full-sized kitchen, and relive the night’s magic in a stylish, comfortable living room. Our properties are pet-friendly, include parking, and provide the high-end amenities that turn an adventurous trip into a luxurious one.
A spectacular adventure deserves a spectacular home base.
Conclusion
A trip to Yellowknife in November is not a vacation; it’s an expedition. It is a journey into the dark, the cold, and the profound beauty of the Arctic. The Aurora Borealis is the universe’s most magnificent light show, and Yellowknife is its grandest stage. To be an aurora hunter is to be patient, to be prepared, and to be willing to brave the elements for a reward that is, quite literally, out of this world.
So layer up, keep your batteries warm, and look up. The hunt is on.
Planning your aurora-hunting expedition this November? Don’t just find a place to stay—find a home. Visit Rent in Yellowknife to browse our luxury apartments and secure your comfortable, warm basecamp for the adventure of a lifetime. Your perfect northern adventure deserves a perfect home. Contact us to start your Yellowknife journey.